
Installation and Configuration of OVH Servers Module for Blesta
This tutorial will show you how to successfully install and configure the module for Blesta. We will guide and help you step by step through the whole process.
Table of different region to generate the API Keys
Reference: OVH Official Reference Page
| Region Name | URL |
|---|---|
| ovh-us (OVH US) | https://api.us.ovhcloud.com/createToken/index.cgi?GET=/*&PUT=/*&POST=/*&DELETE=/* |
| ovh-ca (OVH North America) | https://ca.api.ovh.com/createToken/index.cgi?GET=/*&PUT=/*&POST=/*&DELETE=/* |
| ovh-eu (OVH Europe) | https://eu.api.ovh.com/createToken/index.cgi?GET=/*&PUT=/*&POST=/*&DELETE=/* |
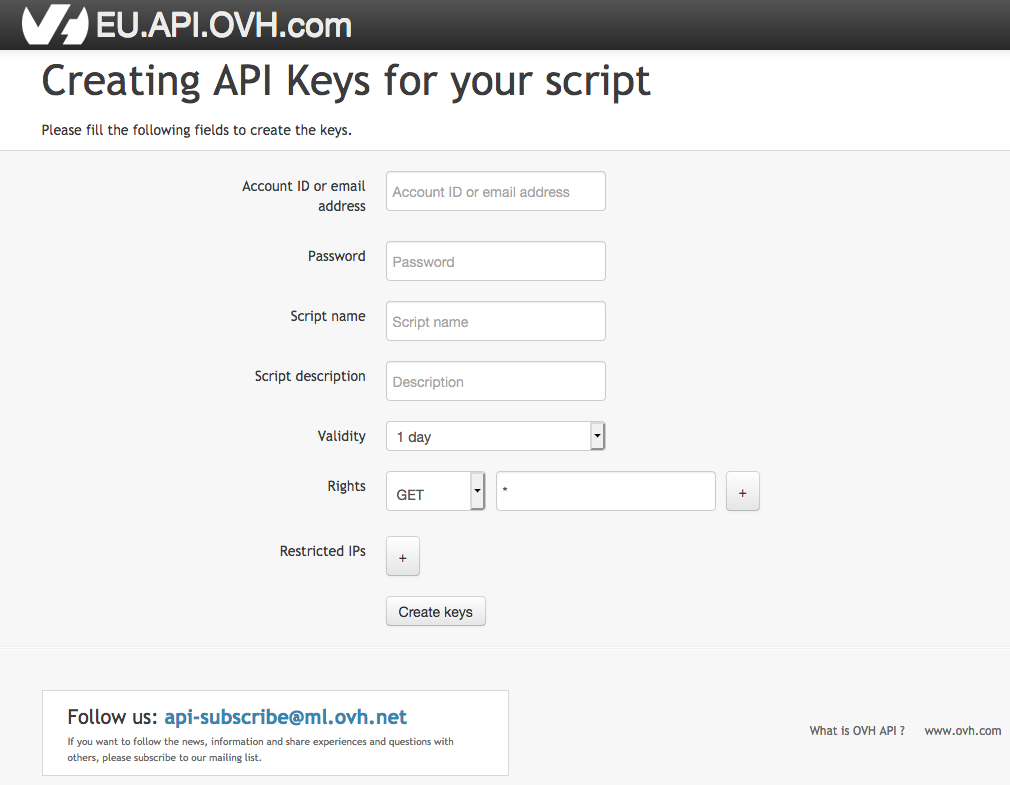
Create your app keys/ Obtaining API Keys
- Any application that wants to communicate with the OVHcloud API must be declared in advance.
- To do this, click the above links based on the region
- Fill in your OVHcloud customer ID, password, and application name. The name will be useful later if you want to allow others to use it.
- You can also add a description of the application and a validity period.
- The Rights field allows you to restrict the use of the application to certain APIs.
Installing and Activating Module in Blesta
- Extract and upload the ovhserver folder to /path-to-your-blesta/components/modules direcotry
- Login into your Blesta Admin Portal
- Go to Settings → Modules → Available → and click on Install next to OVH Server module
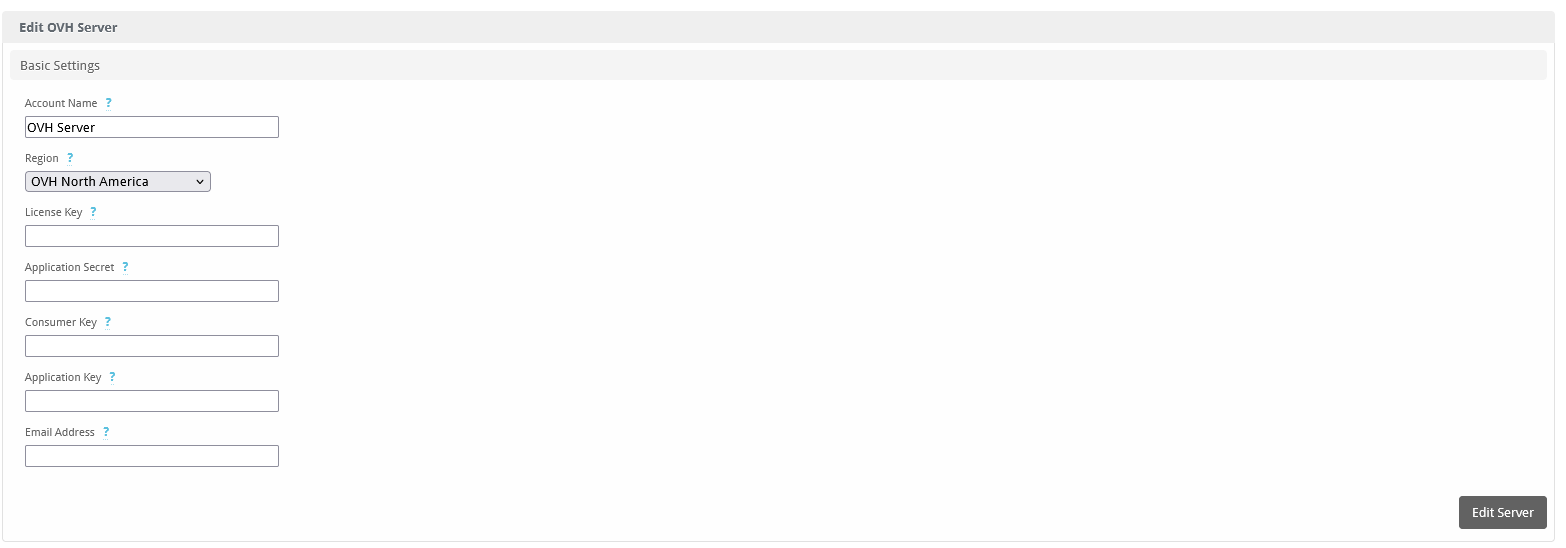
- Go to Settings → Modules → Installed → Manage (next to OVH Server Module)
- Click on Add Account and provide a Name, API Keys (copied from previous step).
- Provide Module License Key, and click on Add Server.
- Sample image below
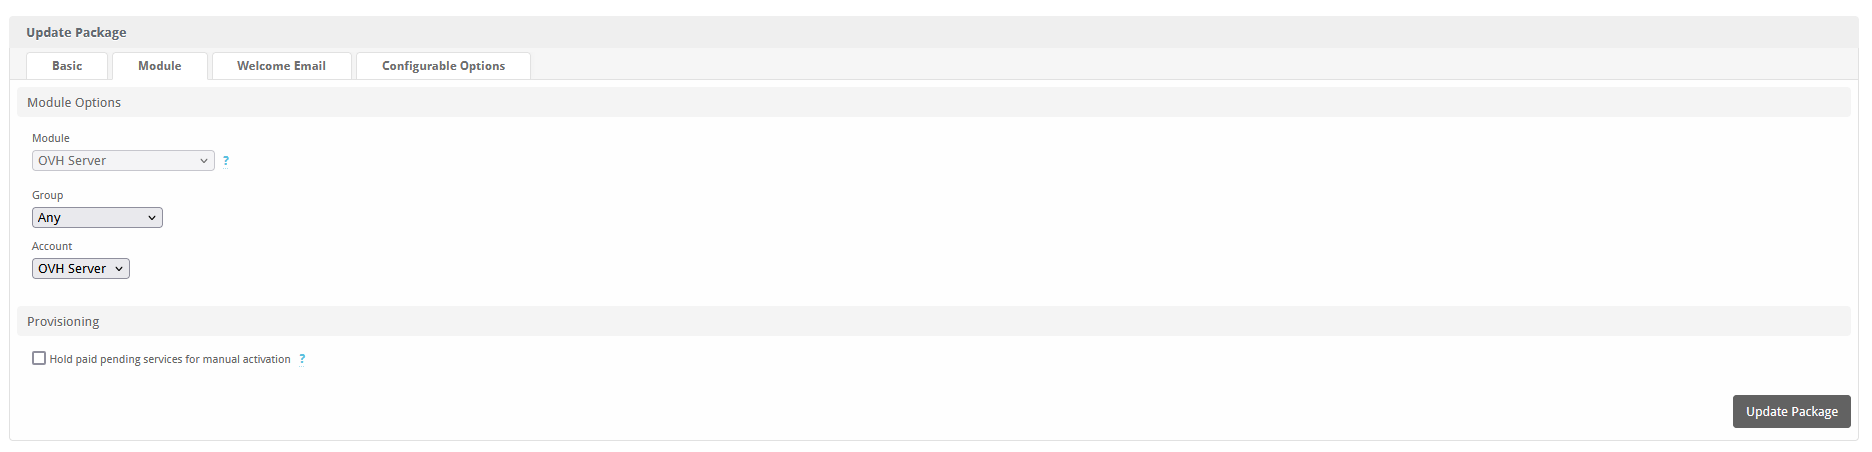
Creating/ Modifying Packages
- Now navigate (Packages → Packages -> Add Package (+) sign → Give a Package and set other thing based on your requirement within Basic Tab page.
- Go to Module Tab → select Module Name: (OVH Server), group : Any , Account, other options ( If you know what it is else leave it )
- And do click on Update or Add Package by selecting your required plan for the package.
Importing and Assigning Existing servers to customer
- Start by navigating to your user’s profile and editing their product/ services.
- Locate the VM ID text box within the service settings (post clicking on the manage link).
- Copy the VM ID from your OVH Server Manager portal.
- Paste the copied VM ID into the VM ID text box in our module.