Installation and Configuration of Hetzner Cloud Module for Blesta
This tutorial will show you how to successfully install and configure the module for Blesta. We will guide and help you step by step through the whole process.
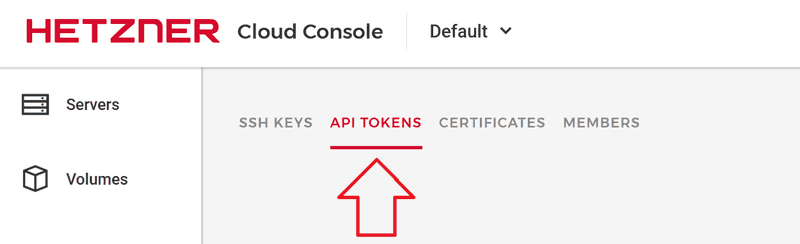
Obtaining API credentials Reference Official Document: https://docs.hetzner.com/cloud/api/getting-started/generating-api-token/
To generate an API token on your Hetzner Console Portal, please open your project and do the following:
- Go to Security on the left menu bar

- Go to API TOKENS on the upper menu bar
- Select GENERATE API TOKEN

- Create your API token
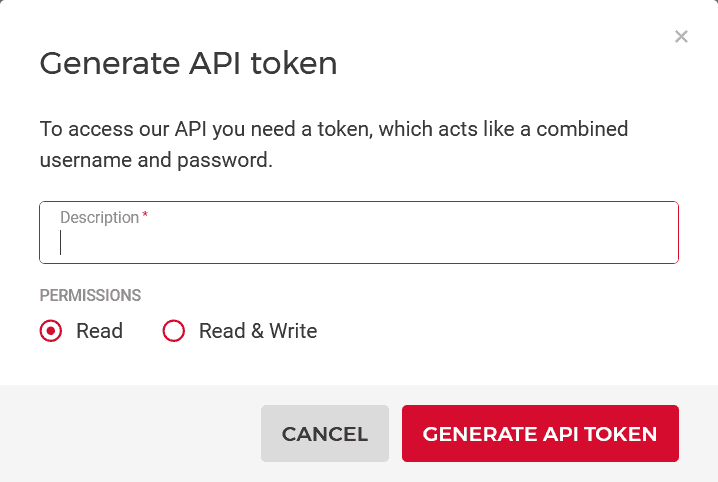
- Enter a description in the upper text box.
- Choose a permission Read & Write as we need this permission.
- Copy your API token
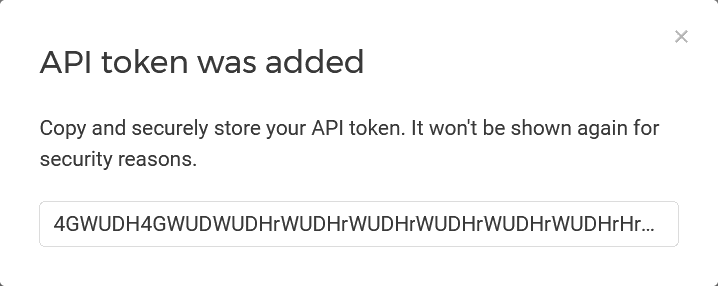 You now have an API token. Note that it is not possible to view the token again once the window has been closed.
Installing and Activating Module in Blesta
- Copy the 'hetznercloud' folder to the directory 'path-to-your-blesta/components/modules' directory.
- Log in to your Blesta Admin Portal.
- Navigate to Settings → Modules → Available, and click 'Install' button next to the Hetzner Cloud module.
- Go to Settings → Modules → Installed, and click 'Manage' next to the Hetzner Cloud Module.
- Click 'Add Account', enter a Name, API Key (generated earlier), and Module License Key.
- Leave the Snapshot box as is unless if you want to enable VM creation from Snapshots.
- Click 'Add Server' to complete the process.
Snapshot (Ideal for Windows VPS)
- Refer to step #6 of the Installation process.
- Assuming you have already created a VPS and taken a Snapshot (recommended for Windows VPS). If not, follow these steps in the Hetzner Console portal: navigate to the Snapshots tab, then click on 'Take Snapshot' as shown in the image below.
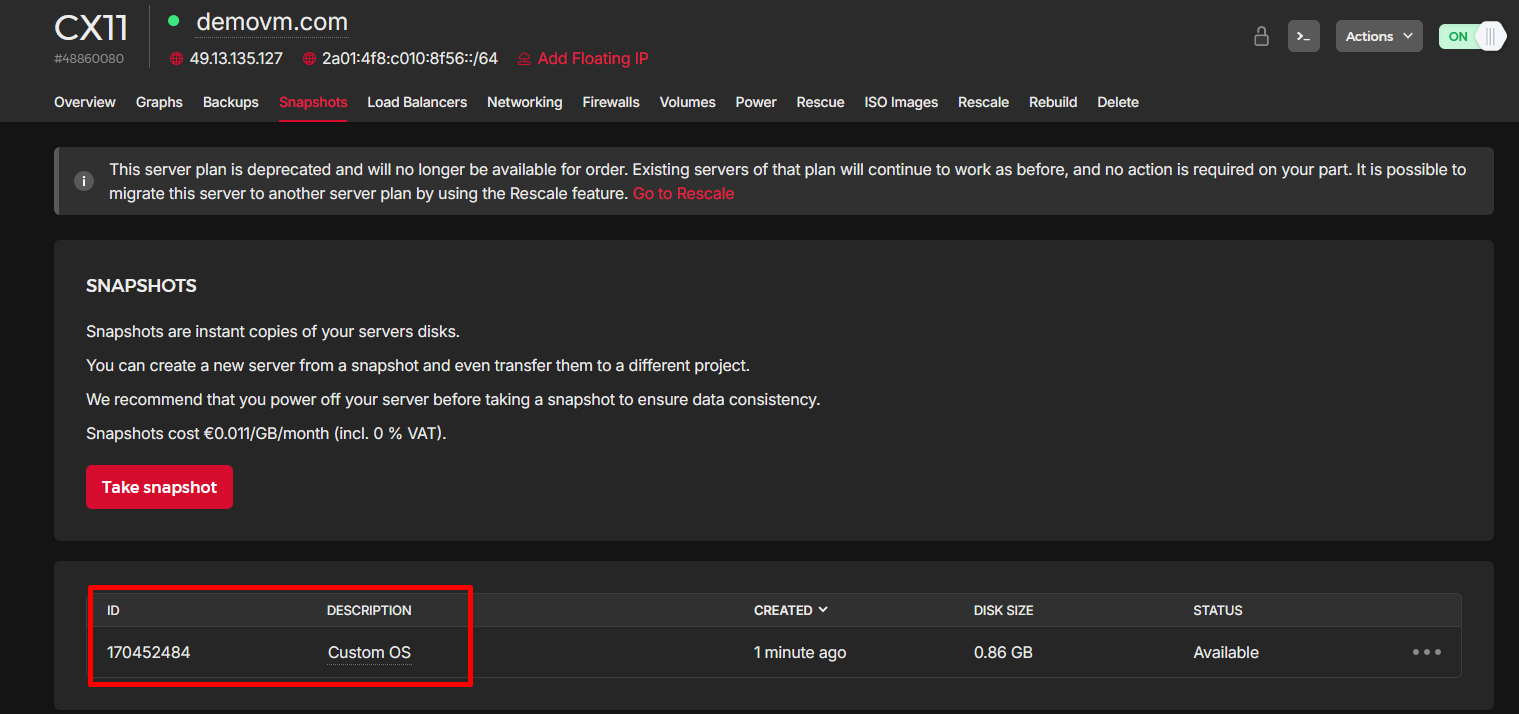
- After creating the snapshot, you'll need to retrieve the snapshot ID, as illustrated in the previous image.
- Proceed to edit the details of your newly added Project/API page, and include the snapshot ID and name as demonstrated below.
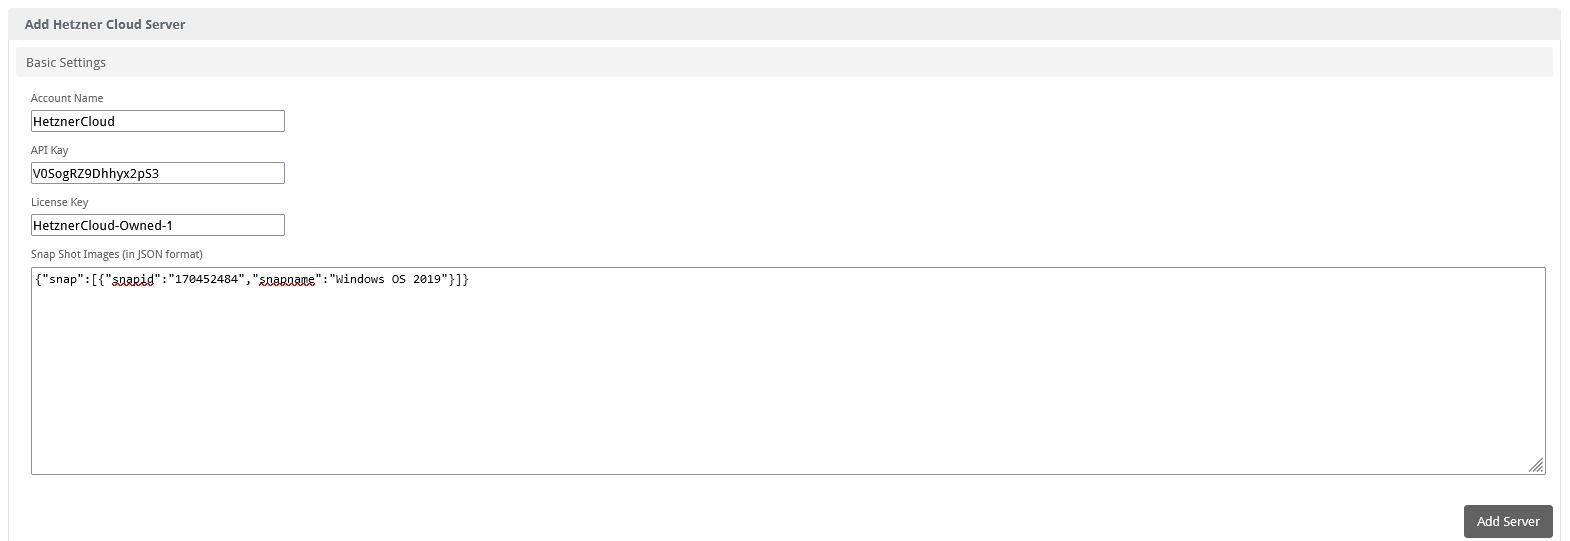
Sample Code:
{"snap":[{"snapid":"170452484","snapname":"Windows OS 2019"}]}Creating Configurable Options
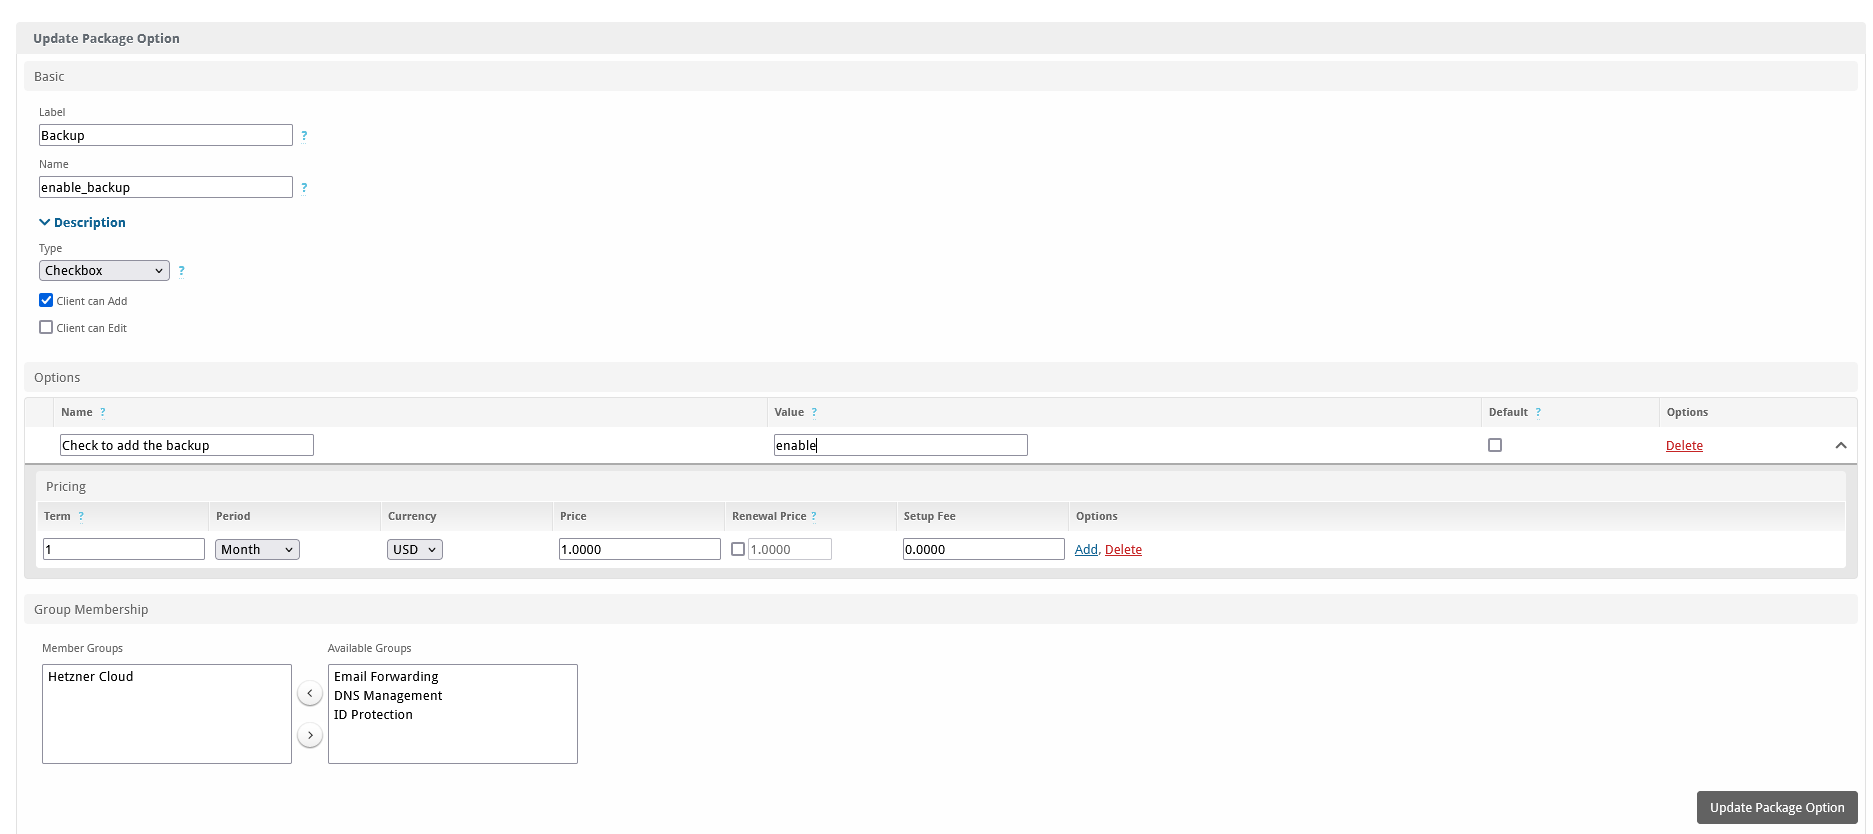
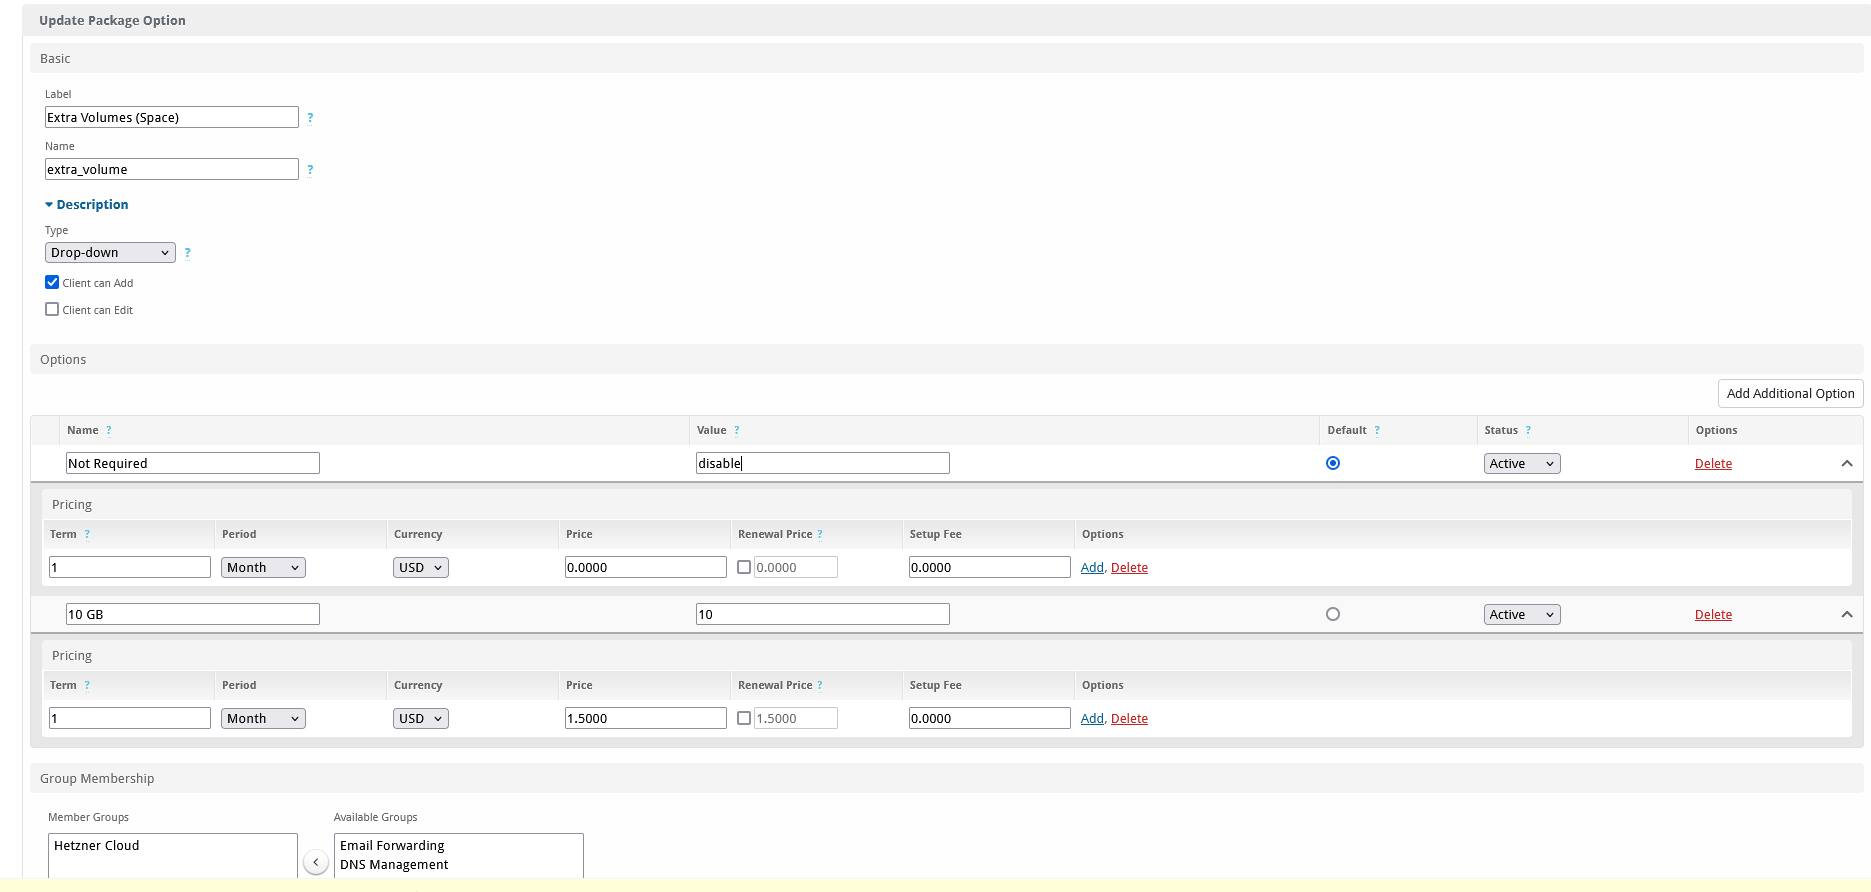
- Go to Packages → Configurable Options → Create a group (Give any name based on your requirement)
- Now click on options and add two options as show below by clicking Create Options
- Backup as show as below (No Changes)
- Volume Configurable Options (You can add as much extra plans ) but do not change anything with first option
Creating/ Modifying Packages
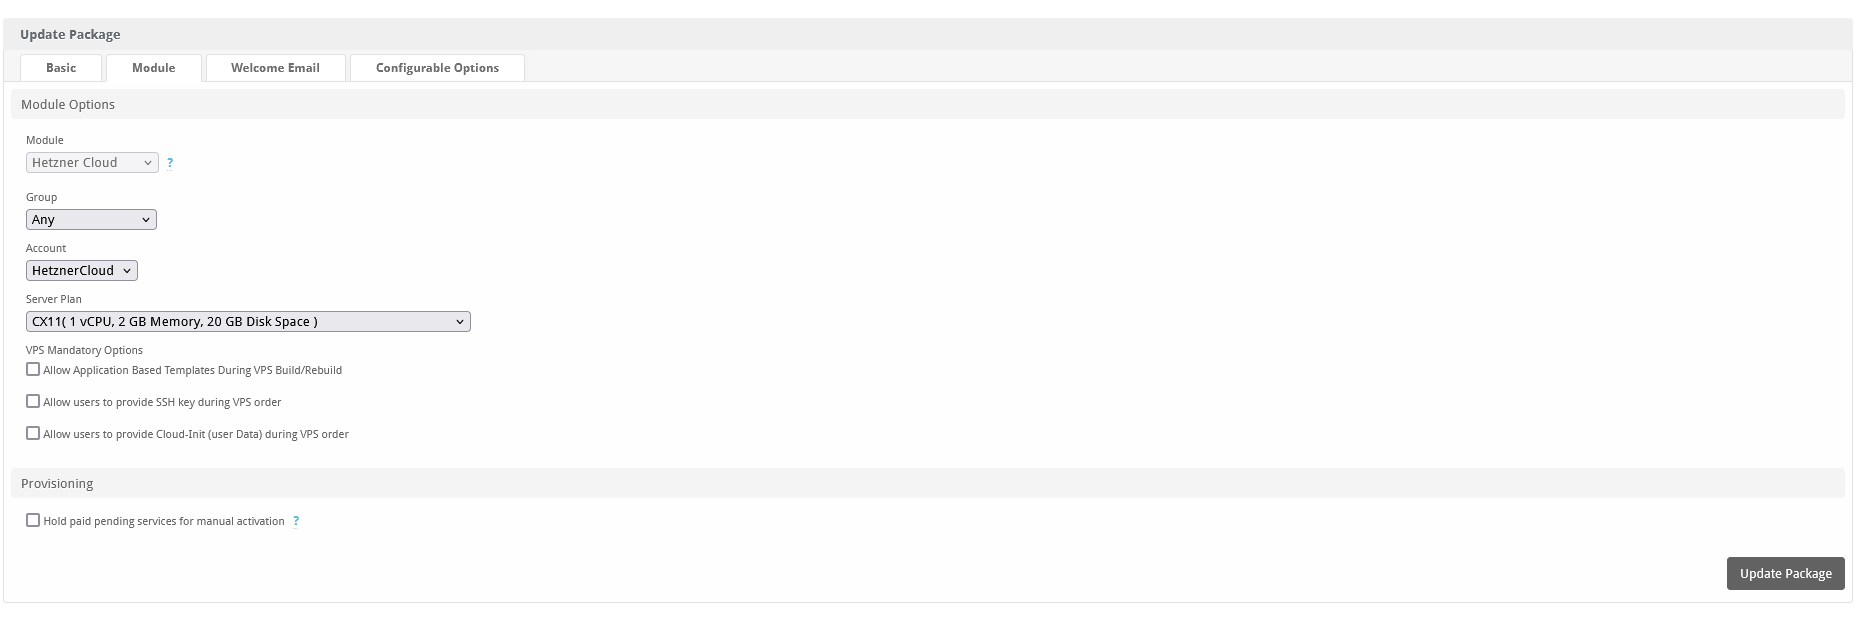
- Now navigate to (Packages → Packages → Add Package (+) sign → Give a Package and set other thing based on your requirement within Basic Tab page.
- Go to Module Tab → select Module Name: (Hetzner Cloud), group : Any , Account, Server Plan, other options ( If you know what it is else leave it )
- And do click on Update or Add Package
- Welcome Email you can adjust based on your requirements and the available fields are: {service.hetznercloud_hostname} {service.hetznercloud_password} {service.hetznercloud_ipaddress} {service.hetznercloud_ipaddressv6} {service.username} {service.hetznercloud_location}
Sample Email
This sample email could be used in the Package Welcome Email section to help you get started. Be sure to enter content for your welcome email in both the HTML and Text sections.
Thank you for selecting our VPS service!

Your VPS, named {service.hetznercloud_hostname}, located at our data center in {service.hetznercloud_location}, is currently being initialized.
You can monitor and manage it through our client area by clicking the "Manage" button next to your server on the Dashboard.

The initial password is located in the "Actions" section. Please allow a few minutes for the VPS to complete the booting process.

Here are some essential details for your reference, which are also accessible from our client area:

Main IP: {service.hetznercloud_ipaddress}
IPv6 Address: {service.hetznercloud_ipaddressv6}
Username: {service.username}
Password: {service.hetznercloud_password}

Thank You.
Importing and Assigning Existing servers to customer
- Start by navigating to your user’s profile and editing their product/ services.
- Locate the VM ID text box within the service settings (post clicking on the manage link).
- Copy the VM ID from your Hetzner Cloud portal.
- Paste the copied VM ID into the VM ID text box in our module.
Migrating from previous HetznerCloud (named hetzner_cloud) module to our HetznerCloud (named hetznercloud) Module
Note: Please make backup of your databases, as we wont be responsible of any data loss if you mesh with any of the below steps
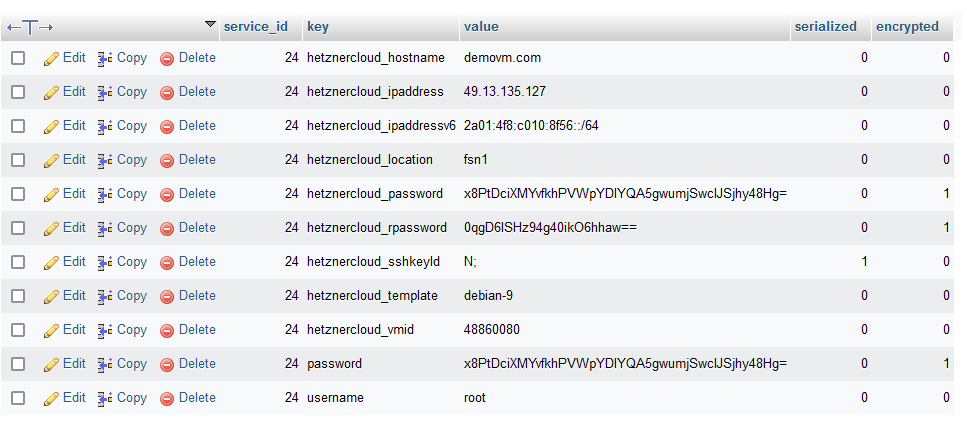
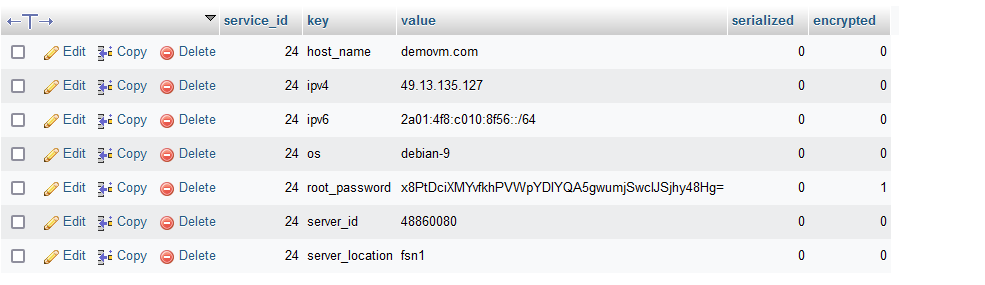
- Assume the following is a sample content snapshot of your previous module within the service_fields table.
- Log in to your hosting control panel (such as cPanel, DirectAdmin, Plesk, or CWP) and access PHPMyAdmin and open your Blesta DB.
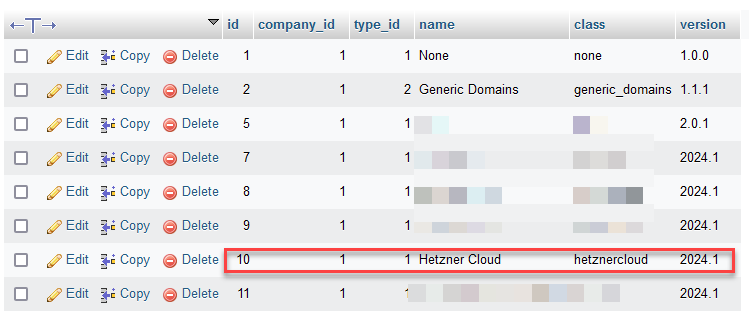
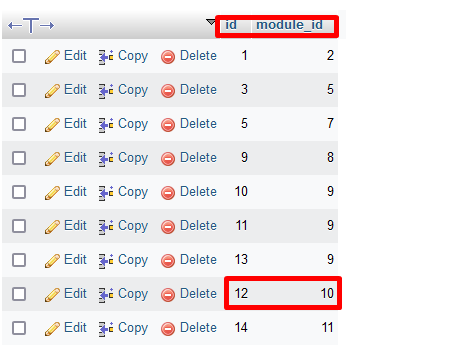
- Locate the modules table and find the ID value for both the old module (e.g., "hetzner_cloud," ID: 2) and the new module (e.g., "Hetzner Cloud," ID: 10).
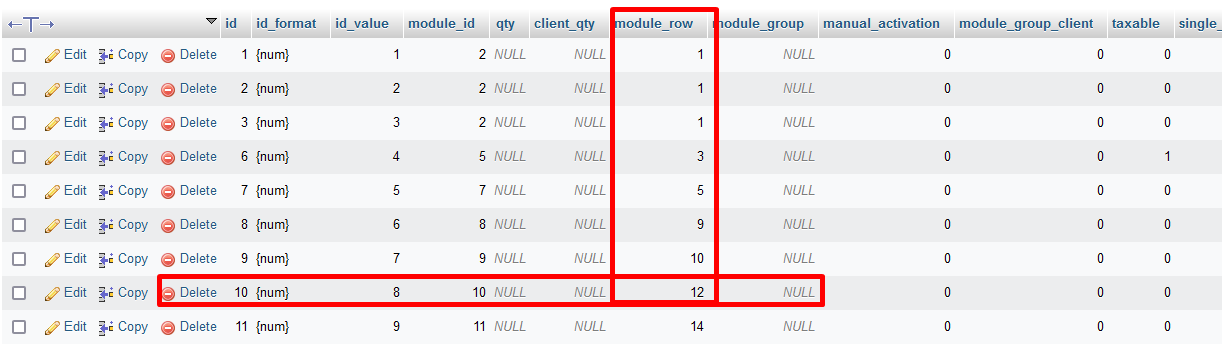
- Search for the module_rows table and locate the ID value (e.g., ID: 12) associated with the module ID for the new module named Hetzner Cloud (ID: 10 from step 3). Note that for the old module named "hetzner_cloud," the ID is 3 where the module_id is 2. Which need to be replaced with new module value for old module value.
- Next, navigate to the module_row_meta table. Locate the entry where module_row_id is currently set to 3. You'll need to update the values as specified below say to 12 (module_rows.id).
Note: : You only need to change key & encrypted colum values ( where for our module relies on these values).

- Now, proceed to the packages table to make adjustments. You can obtain the package ID from Blesta Admin → Packages → Packages menu. Assuming the package ID is 10, you need to update two fields: module_id and module_row. Set module_id to 10 (obtained from step 3, the ID of the new module named Hetzner Cloud from the modules table), and set module_row to 12 (obtained from the module_rows table, corresponding to the module ID from step 4).
- We have completed the transition from the old module called hetzner_cloud to the new module named Hetzner Cloud.
- Now, let's migrate the service_fields values to our new module. To do this, we'll navigate to the customer page from the admin area without the need for manual intervention through PHPmyAdmin. Please open your user profile and click on the down arrow as indicated below, following steps 1 through the image displayed.

- Clicking on the down arrow initiates the migration of existing module service fields values to our new module's service field values, as illustrated below. And ignore any error.

- Please refresh the page. Afterward, if you click on the down arrow again, you will see that the migration has been successfully completed, as depicted in both the database image and the services image below.